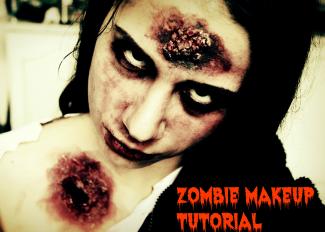
It’s Halloween, and time to dress to impress – with as much fake blood as possible. Here’s an easy zombie-tutorial that will make your friends shiver!
Before starting, find a reference picture and think about what kind of zombie you want to be. An easy way to think in terms of colour is that we have three basic colour palettes for three different types of zombies.
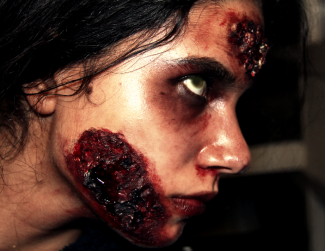
The first one is based on different shades of red, as seen in films such as 28 Days Later. It generally looks better on darker skin, as light skin can make the reds look unrealistic.

The second palette consists of yellow/green, burgundy and black. These colours are used to make it seem like you are decaying, most famously used in The Walking Dead.

The third variation uses dark colours only, mainly grey, dark red and black, as seen in Dead Snow.

Blood is of course used in all of them, whether you want to be a fresh-faced living dead, a decaying walker or a rotten Nazi-zombie.
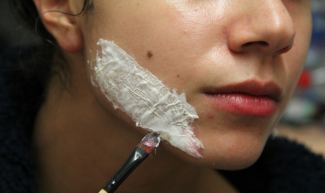
Start with clean and moisturised skin. Take some liquid latex on a brush and paint it over the area you want the wound to cover. Tear toilet paper into the shape you want and place it on top. Add another coat of latex around the edges and the centre and wait for it to dry. Once it is dry, add another coat of latex and paper. Continue doing this until you feel your wound is thick enough. I usually use three layers of paper.
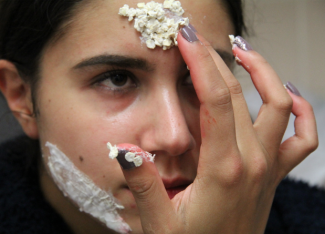
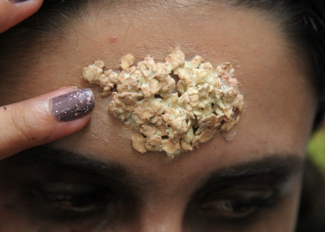
While the wound dries, take liquid latex in a cup and mix it with something that will create the texture of an infected area. I like to create rotting blobs, so I used oats. Stir it together until it becomes a firm substance and place it on the skin. Seal with liquid latex on the edges.
WARNING – do not use liquid latex where you have hair. It peels off clean skin with warm water, but if you place it on top of hair, taking it off will be a painful experience.
While the wound and infected area are drying, take a brush and use black facepaint around your eyes, the more uneven, the better. I would recommend sealing it with black eyeshadow afterwards. Take a bit of red facepaint and smudge over and around the black and in the circles of your eyes.
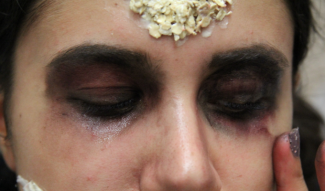
If you want a more hollow face, use a colour that is a couple of shades darker than your face and smudge down the edges of your nose and then into your cheekbones.
Powder the wound and infected area. Then take a skin-coloured facepaint or foundation and colour both to make sure the edges blend into your skin.
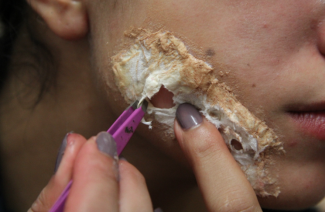
With tweezers, start pulling the tissue carefully from side to side, creating holes of different sizes. I use the back of a brush to make the holes bigger.
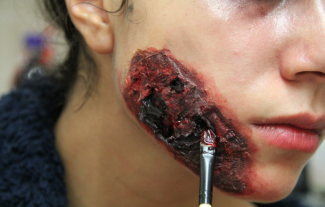
Once you have made the holes big enough, find a reference picture of a wound and paint it. I use black in the centre of the holes, purple around the edges and red on top of everything else. Once you are done, dab gel blood into the wound. You can use what fancy dress shops refer to as ‘vampire blood’ if you want a wound that is runny, but for a more realistic and decaying wound, gel blood is more viscous and will look better.
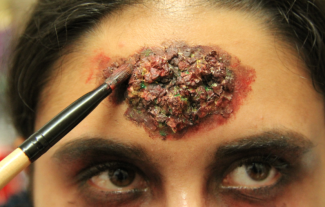
With the infected area, you want to think about the palette you decided was the right one for you. I used black, brown, red, yellow and green. The black was used as a base in the hollows, the brown around the edges, then dabs of yellow and green where it was appropriate and red on top. Blend the edges with your fingers. Dab gel blood over the area.
Take the remaining colours on your brushes and smudge them on your hands, neck, face – areas that are visible. Wear contact lenses if you wish to, ruffle up your hair and you are done.
For makeup and other costumes, Partica, a fancy dress shop in Kingston, will provide you with everything you need for this tutorial. For brushes, I would recommend buying cheaper alternatives in Superdrug, Tiger or Boots. If you are going as a zombie, rip your clothes, burn holes in what you’re wearing, rub the clothes on the ground to make them dirty and add some blood– visit Primark to find cheap clothes that you won’t regret destroying.
Happy Halloween!